Flickr Photographer Jeffrey Bail posted a tutorial on the Digital Photography School about how to create an inexpensive light tent. He didn’t want to pay $100+ for such a contraption, so he was able to make his own fairly cheaply. I decided I had to explore this a bit more.
First, I decided to check availability. I’m basically a lazy person, so if I can find something pre-made at a reasonable price, I’ll go ahead and pony up. Also the idea that something pre-made might be collapsible and easy to store appealed to me. At our local Wolf Camera, they had light tent kits starting at $109, which included a 20" X 20" cube and two lights. Online, they have a cube only for $49. That’s almost tempting, but I decided to see what I could come up with.
Bail’s method used a cardboard box covered with white muslin, with white Bristol board for the background. He used a daylight bulb with a standard desk lamp. To me, this seemed like it would present some storage problems. I considered several alternatives. The first would be to construct a frame from PVC pipe and drape with fabric. Another idea would be to use a hanging file frame, usually made out of light metal. I even considered knocking the sides out of a white styrofoam cooler, although that would also have been hard to store. The solution I came up with was even easier.
At Walmart, I found a transluscent file box for just under $10. This was perfect. I bought two yards of white crepe fabric for a total of $2, just in case I needed to darken it a bit. Also purchased was a daylight bulb and a utility lamp with metal reflector. I also bought two sheets of poster board. Total cost was about $25. The bulbs, lamp, and box were the most expensive.
I wound up not using the fabric at all. I cut the posterboard to the right width, then just slid it into the box with a curve. I placed the lamp on top, and I was ready to shoot. Here’s picture of the setup…
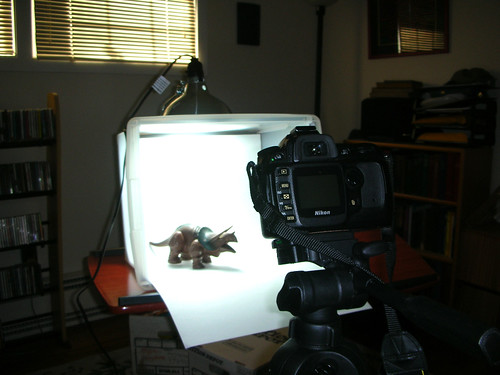
The cool thing about this is that I didn’t have to cut the box at all. It comes with a lid, so I can store the fabric, lamp, and posterboard inside the box when it’s not needed. The results were pretty good…
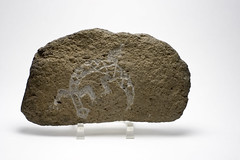
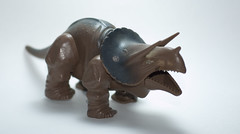

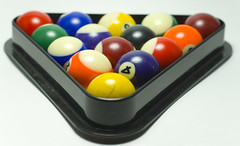
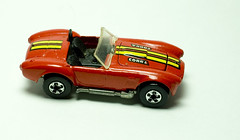
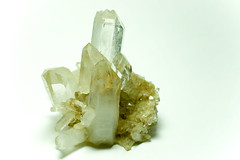
These were shot with my 50mm Nikkor lens, some at f/1.8 and some on automatic. I was getting some vignetting, depending on where I placed the lamp. I’ll need to tweak the lighting a bit until it’s perfect.
[tags]photography, light tent, light box, tutorial[/tags]
Thanks for mentioning me.
Many people contacted me after the article concerning storage problems. I have to agree with this also. I Did make another light tent that can fold up using fabric, glue, wire and coat hangers.
If you want, you can check out the new article
http://www.jpgmag.com/stories/458
Wow this is fantastic! i’ve been searching the net for homemade light boxes but this one i think is just so simple, i like the thought of being able to store your materials in the box when your done. hahaha i have just the same box too!! question though, what light did you use? what wattage would you recommend?
John – I used a compact fluorescent bulb in a simple metal utility lamp. It was a 60 watt “daylight” bulb. That gives better results than the soft light bulbs.
Actually, you could try different ones to see which works best for you.
Thanks so much! I am revamping my photography and I can not wait to try this with my jewelry!!! Your article has really helped! Thanks!!!!
Taylor
http://taylorlartiste.blogspot.com/
Wow! You got a really good deal on those, I bought my photo tent off http://phototent.net for like $80 I think it was, I like it but wish I saw this first.