Anyone who has been following this blog knows that one of my favorite past times is to head out into the country with my camera and just explore. I enjoy not just the exploration, but the documentation of exploration, either by writing about it here, keeping a GPS track, or by geotagging the photos I take. I am constantly refining this workflow, so that the documentation doesn’t detract from enjoying the moment, or be such a burdensome task that it never gets done afterwards. There’s one hard and fast rule I’ve learned – keep the GPS running. That’s it. If you’ve got that GPS track, just about everything else falls into place.
Take for example this past weekend. I had Saturday afternoon to explore, so I decided to cruise through some of the communities of southern Spartanburg and Union Counties. Along the way I hit the communities and towns of Pelham, Woodruff, Cross Anchor, Cross Keys, Rose Hill, Union, Buffalo, West Springs, Glen Springs, Pauline, Roebuck, and Moore, roughly in that order. I can confirm this by my GPS track in Google Earth, as seen below:
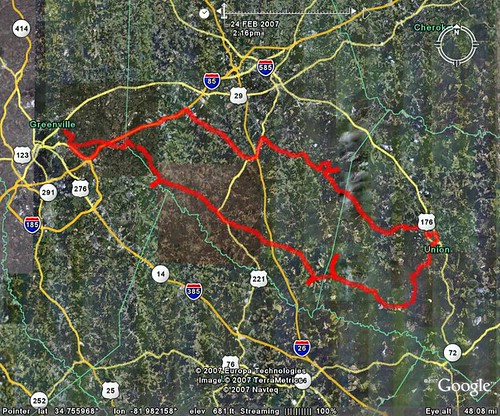
To create this track, I imported my GPS data into ExpertGPS from Topographix, saved it as a GPX file, then imported the GPX file into Google Earth. The steps are fairly simple, and are easy if you’re familiar with these two programs. This, in turn, helped my geotag some of the photos I took along the way.
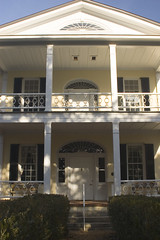
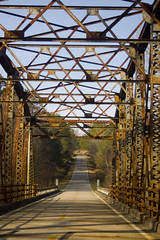
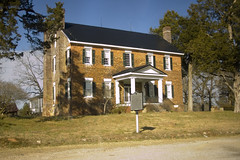

There are more from this trip on my Flickr account. Even with the above track, I had trouble geotagging some of the images. I didn’t take the time to create a waypoint at each location, nor did I bother to write down the lat/long coordinates. To do so would have "detracted from enjoying the moment," as I had stated earlier. I had to rely on my memory after the fact as I was processing the images and uploading to Flickr. Subsequently, one or two images didn’t get geotagged because I forgot where I took them.
I think I finally have the problem solved, especially if I follow my rule above and keep the GPS running. The solution is brilliant in its simplicity, and I only wish I had been the one to come up with it. The GPS track has a time stamp for each of the locations along the path. The camera includes a time stamp in the EXIF data for each of the images. All you have to do is match the time stamp of the GPS track with the time stamp of the image, and you’ve got when and where the image was taken. You just have to make sure that the internal clock on your camera is synchronized with the GPS clock.
You could do this manually, but quite frankly it would be easier to take your best guess and use Flickr’s map tool. Fortunately, there are a couple of automated options. If you already have a GPS, then RoboGEO is your answer. The program does exactly what is described above – it matches the timestamps between the GPS and the camera. RoboGEO then writes the new lat/lon coordinates to the EXIF data for the image. It also provides a ton of output options, include output to KML/KMZ files for Google Earth, output to various mapping programs, including ArcGIS, and an uploader for Flickr. All-in-all, it’s a pretty good deal for $40.
If y ou don’t already have a GPS, or you’re just really into niche gadgetry, you might want to try the Sony GPS-CS1. This is a small 3.5 inch cylindrical device with a carabiner attachment. You turn it on, then just carry it around as you shoot your pictures. It comes with software to write the timestamp data from the tracklog to your images’ EXIF data, similar to the way RoboGEO works. The GPS-CS1 has no screen. It’s only function is to create a tracklog. If that’s all you need, then this might be an advantage. Without having to power an LCD screen and do all the other processing that other handheld GPS units do, it has very low power consumption and can run for quite awhile. The disadvantages are that you can’t see the data until you dump it into a computer. I’ve also seen some reviews that say it’s 15 second update cycle makes it not as accurate as some handhelds for location, and that it takes awhile to lock onto the satellites.
As for the Sony software, it seems to be very rudimentary. Most reviewers I’ve seen who actually use this record their tracks with the GPS-CS1, then do the software synchronization with RoboGEO, since it has so many more options for editing, output, etc.
Since I’ve already got a GPS, I opted for the RoboGEO method. I’ve done a couple of tests with both my Nikon D50 and Nikon S1. Geocoding on the D50 seems to be very accurate. Apparently the S1 is off by a few seconds, because the image locations aren’t quite right. Invariably, they are about a half-mile off, which would be consistent with the time sync being off a bit. I’ve also discovered that the software will geocode GIF and JPG images, but not RAW images. Since I shoot mainly RAW files, I’ll have to wait until post-processing to do the geocoding. When I get the workflow finalized, it’ll probably look like this…
Shoot and track –> Save GPS track as GPX –> Process images –> Geocode JPEGS against GPX with RoboGEO –> Upload to Flickr
It may look complicated, but it’s actually less time-consuming and a heck of a lot more accurate than my old "guess the location" method. I just need to keep the GPS with the camera, and keep the GPS running.
[tags]Google Earth, geotag, geotagging, photography, RoboGEO, GPS-CS1[/tags]
Speaking about €œgeotagging€: do you know locr?
locr offers the ideal solution and makes geotagging exceptionally easy. locr uses GoogleMaps with detailed maps and high-resolution satellite images. To geotag your photos just enter address, let locr search, fine-tune the marker, accept position, and done! If you don€™t know the exact address simply use drag&drop to set the position.
For automatic geotagging you need a datalog GPS receiver like the Sony GPS-CS1 in additon to your digital camera. The GPS receiver data and the digital camera data is then automatically linked together by the locr software. All information will be written into the EXIF header.
With locr you can upload photos with GPS information in them without any further settings. In the standard view, locr shows the photo itself, plus the place it was taken. If you want to know more about the place where the photo was taken, just have at look at the Wikipedia articles which are also automatically assigned to the picture.
Have a look at http://www.locr.com.